


Vergo is making it easier than ever to keep your financial documentation in order with minimal effort. One innovation is the ability to automatically match receipts to transactions. In this tutorial, we will walk you through how to seamlessly use the Vergo app to streamline this process.
Introduction
Tired of digging through piles of old receipts and transactions? With the Vergo app, you can upload a receipt and have it automatically matched to the corresponding transaction. This intelligent software leverages artificial intelligence to recognize and pair receipts with transactions by analyzing details such as the date, merchant, and amount. Say goodbye to the manual search process and let technology do the work for you!
Getting Started with Vergo
Step 1: Opening the Vergo Mobile App
Begin by opening the Vergo app on your mobile device. Once inside, you'll see a list of transactions awaiting matching receipts. This intuitive feature simplifies the workload for your team by allowing them to easily photograph, code, and have the app automatically do the matching.
Step 2: Uploading a Receipt
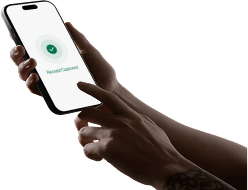
In this example, choose any receipt you wish to upload. Trigger the camera feature located at the bottom right of the app interface. After taking a picture of the receipt, you will witness an animation illustrating the software scanning the receipt. The app accurately identifies the merchant, date, and amount to pair the receipt with the matching transaction.
Step 3: Adding Job Costing Codes to a Receipt
Besides the effortless receipt upload process, the Vergo app allows you to input additional information such as job costing codes, memos, and other relevant details. Use the "Auto Match to Transaction" button to send the receipt to the cloud where it will be automatically matched with the corresponding transaction.
Verification and Management
Step 4: Validating Data in the Web Dashboard
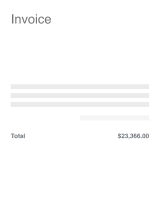
Once the transaction matching is complete, verify the information in the web dashboard. Here, you can see matched receipts, transaction details, and any job cost information that has been automatically attached. Receive notifications on successfully matched receipts and validate the accuracy of the information.
Step 5: Unmatching and Reviewing Transactions
In rare cases where the matching isn't accurate, Vergo provides the flexibility to unmatch receipts from transactions. By accessing the receipts tab, you can review scanned information, along with user-uploaded details, ensuring data accuracy with an impressive 99%+ success rate.
Conclusion
Efficiently managing receipts and transactions no longer requires tedious manual intervention. By using the Vergo app, you can benefit from its capability to automatically match receipts with transactions, saving time and reducing errors. This tutorial illustrated steps to upload a receipt, validate matching, and manage transactions – offering a simplified financial workflow for both individual users and finance teams.
We hope this guide makes your financial management smoother and more precise. Go ahead, take advantage of the powerful Vergo app, and streamline your financial operations today!
